How to Grow Burdock from Seed
Deep roots, deep rewards.
Plant Profile: Burdock (Arctium lappa)
Type: Biennial (grown as an annual for root harvest)
Hardiness Zones: 4–9
Germination Time: 7–14 days
Days to Maturity: 90–120 days
Soil Preference: Deep, loose, well-draining, loamy soil
Sunlight Needs: Full sun to light shade
Spacing: Thin to 4–6 inches apart
Row Spacing: 18–24 inches
Water Needs: Moderate and consistent
Harvest Time: When roots reach 1–2 feet in length (typically late summer to fall)
Why Grow Burdock?
Burdock is a nutrient-rich root vegetable with an earthy flavor and medicinal value. While it’s often found growing wild, cultivating it in the garden gives you fresher, cleaner roots with much more control over quality.
Its deep taproot is packed with minerals, supports digestion and liver function, and stores beautifully for winter use. Plus, it’s a unique addition to any homestead or herbal kitchen garden.
How to Grow Burdock from Seed
1. Choose the Right Location
Burdock sends down a long taproot, so site selection is key. Choose a spot with:
Deep, loose soil free of rocks or heavy clay.
Full sun, although partial shade is tolerated.
Plenty of space—this plant gets tall (3–6 ft), especially if left to flower.
If your soil is compacted, consider using a raised bed or trenching deep into the native soil to loosen it before planting.
2. Direct Sow in Spring (or Fall in Mild Climates)
Burdock does not transplant well due to its taproot, so direct sowing is the best method.
When to Plant: As soon as soil is workable in spring, or in late summer for a fall harvest.
How to Plant: Sow seeds ½ inch deep in rows 18–24 inches apart.
Thinning: Once seedlings have emerged and are 2–3 inches tall, thin to 4–6 inches apart.
💡 Tip: Soak seeds overnight before planting to speed up germination. Cold stratification is another way to boost germination ⬇️
Cold Stratification
You don’t necessarily need to cold stratify burdock seeds, but doing so can improve germination rates—especially if the seeds are older or haven't been stored in cool conditions.
Here's why:
In nature, burdock seeds fall to the ground in the fall and go through a cold winter before sprouting in spring. Cold stratification mimics that natural dormancy break, softening the tough seed coat and signaling that it's safe to grow.
To cold stratify:
Place seeds in a damp paper towel inside a sealed bag.
Refrigerate for 2–4 weeks before planting.
We are currently experimenting with a new cold stratification technique that has worked VERY for us - freeze for 48 hours in a bowl of water. More to come on this!
While burdock will usually germinate fine when direct sown in spring, cold stratification can lead to quicker, more uniform sprouting, especially in less-than-ideal soil conditions.
3. Watering and Care
Keep soil consistently moist, especially during germination and early root development. Avoid overwatering, but don’t let the soil dry out completely—burdock doesn’t like drought stress.
Weed regularly to reduce competition, especially early on when seedlings are small.
4. Mulching
Mulch around the base with straw, leaves, or grass clippings to retain moisture, since you’ll want to plant it away from your garden due to its large taproot and tendency to spread quickly.
5. Watch It Grow
If left for a second year, burdock will flower and produce large, burr-covered seed heads (which stick to clothes and animals). Most gardeners harvest in the first year to avoid invasiveness and get the best-quality roots. Burdock spreads, so be sure to harvest these seed heads or your garden will be COVERED in burdock. If you are looking to start a medicinal garden (separate from your vegetables), don’t harvest the seed heads and it will spread over a fairly large area the next spring.
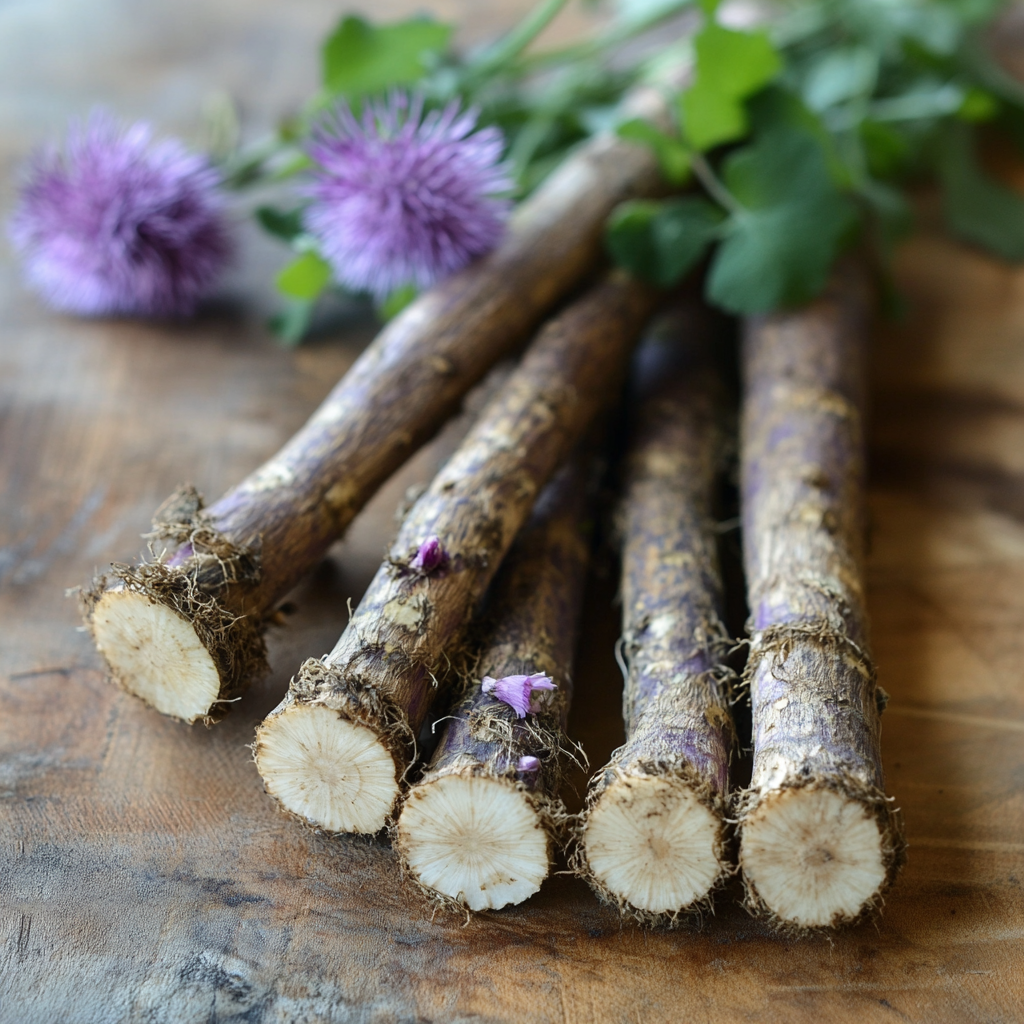
6. Harvesting Burdock
Harvest between 90–120 days, usually in late summer or early fall, before the ground freezes.
Use a digging fork or shovel to loosen soil deeply and carefully pull up roots.
Roots can reach 2–3 feet long, so dig wide and deep to avoid snapping them.
7. Storage Tips
Do not wash roots before storing—brush off excess soil and store in a root cellar or fridge in a perforated bag or container of damp sand.
Burdock roots will store for several months in a cool, dry and dark space (think back of your pantry).
Bonus: What About the Leaves and Flowers?
Leaves can be used as compost or mulch but are too bitter for culinary use.
If you let burdock flower, it will attract pollinators—just keep in mind the burrs are tenacious and may spread aggressively if not managed.
Things to Watch Out For
Invasiveness: If allowed to flower and set seed, burdock can become invasive. Harvest roots before year two to prevent spread.
Hard Soil = Broken Roots: Ensure deep, loosened soil or raised beds to avoid frustration at harvest time.
Look-Alikes: Burdock resembles wild rhubarb when young—label it if growing near similar plants!
Burdock in the Kitchen & Medicine Cabinet
Burdock is delicious in:
Stir-fries
Soups and broths
Pickled dishes (like Japanese kinpira)
Teas or tinctures (roots are detoxifying and support liver health)
Salves - soak in olive oil for 3-6 months, strain and add to beeswax to make a topical skin salve for minor aches and pains.
Burdock may not be your average backyard crop, but it’s incredibly rewarding to grow. Whether you’re harvesting for flavor, medicine, or just the experience of cultivating something wild and useful, burdock brings a special kind of magic to the garden.